Diagnosing potential machinery shaft alignment issues can be difficult and time-consuming, so maintenance professionals approach it as simply as possible. They break down shaft alignment in two ways: determining the issue and finding out how best to repair it.
This article on shaft alignment will explore the most effective tools and procedures for diagnosing and maintaining rotating shafts such as pumps, motors, fans, and more.
What is Shaft Alignment?
Shaft alignment is a critical procedure that ensures the precise positioning of two or more machine shafts. It corrects shaft misalignment as a result of offset or angular discrepancies and enables shafts to operate in a straight line within specified tolerances.
Proper shaft alignment is essential for preventing premature wear and potential damage to machinery. Regular practice of this procedure enhances system reliability and performance.

What are the Five Symptoms of Shaft Misalignment?
In general, there are five symptoms to watch for when determining shaft misalignment:
- Increased vibration: One of the most noticeable signs of shaft misalignment is an unusual increase in vibration. Excess vibration over time can lead to premature wear of bearings and other components.
- Unusual noise: A misaligned shaft often causes a noticeable increase in noise during operation, indicating friction and stress on machinery parts.
- Excessive heat generation: Misaligned shafts can lead to excessive heat due to increased friction, posing a risk to equipment safety and efficiency.
- Seal and bearing failures: Frequent failures of seals and bearings can be a clear indicator of ongoing misalignment issues.
- Reduced operational efficiency: Ultimately, shaft misalignment can lead to decreased performance and efficiency. If you notice an increase in machine energy consumption and operational costs, it could be a sign that something is wrong.
How Do You Fix a Misaligned Shaft?
Fixing a misaligned shaft typically involves several steps. To start, identify if your machine is experiencing angular or parallel misalignment, or a combination of both.
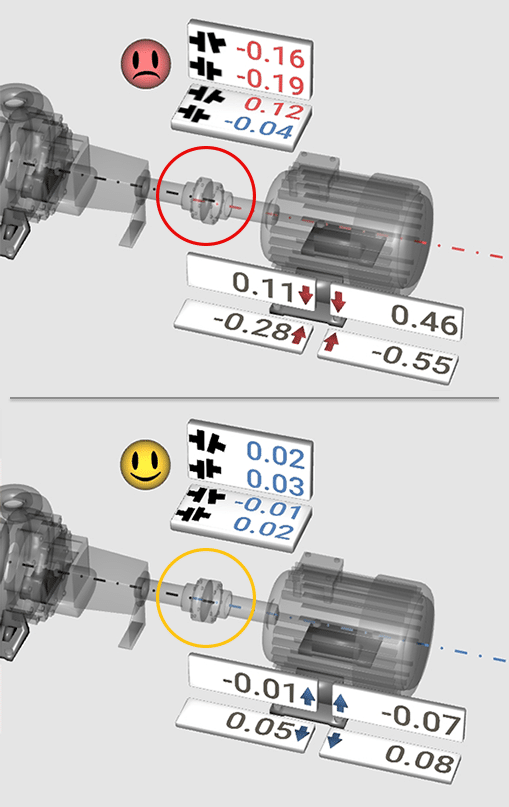
Shaft alignment tools, particularly those that employ laser technology, can determine the misalignment type. They also facilitate precise measurements and adjustments. These tools help achieve the desired alignment by providing accurate data on the positional discrepancies between shafts, enabling technicians to make necessary corrections.
How Do You Check Alignment on a Shaft?
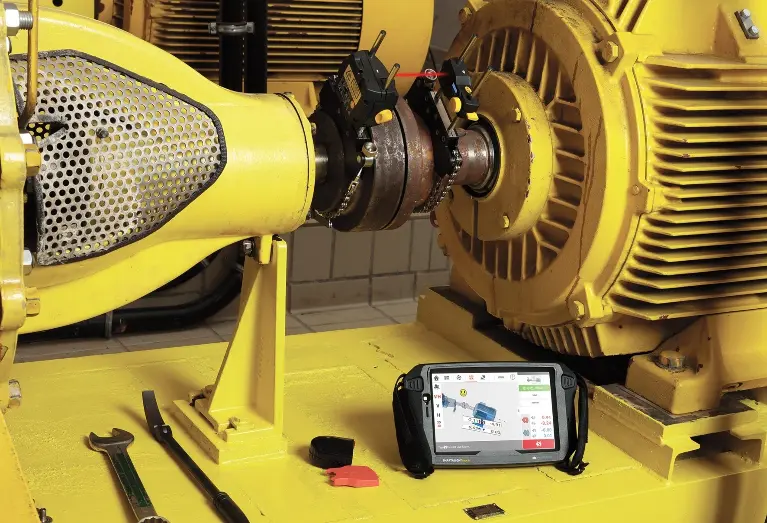
Checking shaft alignment involves a systematic approach using advanced tools. Shaft alignment lasers are among the most effective instruments for this purpose, offering high precision when measuring the alignment between shafts.
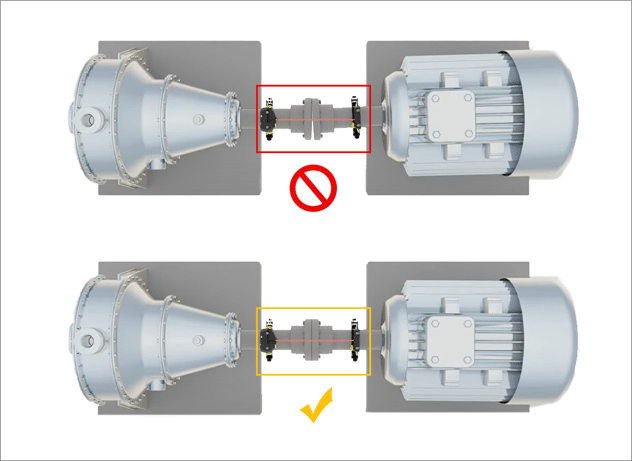
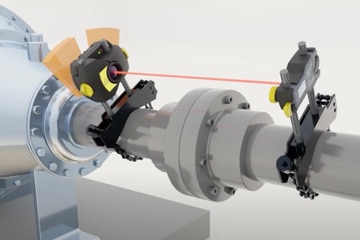
The process includes mounting laser devices on each shaft or coupling and then measuring the alignment condition via the laser beams and detectors. The data collected throughout this process guides the adjustment procedure to align shafts accurately.
How Often Should Shaft Alignment be Checked?
The frequency of shaft alignment checks depends on several factors, including the type of machinery, its usage intensity, and environmental conditions. As a general guideline, shaft alignment should be thoroughly checked at least once a year or following any major maintenance activities.
However, for equipment operating under high load or in critical applications, more frequent checks — such as twice per year or on a quarterly basis — may be necessary to ensure continuous operational efficiency and reliability.
Why is Shaft Alignment Important?
Shaft alignment improves the efficiency in which machines and assets operate. If shafts are not properly aligned, it could reduce the lifespan of the machine, increase parts costs, machine downtime, labor, and energy. Once proper shaft alignment is achieved motors run more efficiently, uptime is increased, and overall operating costs decrease. Your storeroom will likely save money on parts inventory management. If misaligned shafts aren’t addressed it could lead to vibration, increased temperature or overheating, bearing failure, coupling failure, or shaft failure.
What Are the Benefits of Shaft Alignment
It’s hard to overstate the benefits of correct shaft alignment.
Shaft alignment can reduce downtime and increase the life of your assets by preventing unnecessary wear-and-tear on your parts. Over time, incorrect alignment of parts causes excess vibration and friction. That, in turn, leads to premature wear on your equipment parts, decreased performance, and a more frequent need for repairs.
Correct shaft alignment can also create a safer work environment. Faulty alignment can be bad for the environment and dangerous for employees. It can lead to fuel leaks, excess energy use, and unsafe noise levels. Correct alignment puts an end to these hazards. It also boosts your bottom line by saving you money on energy usage.
The Methods and Techniques of Shaft Alignment

There are a few different ways to check for shaft alignment.
Tools like calipers and dial indicators measure the distance between coupling halves. Through a careful process, technicians can bring misaligned shafts back into alignment.
Calipers and dial indicators can work well – but they take time, dedication, and specialized training to do well. They are also not as precise as modern laser alignment tools.
Today, more and more plants are using laser alignment tools because they offer greater precision. They are also fast and easy to use, even for people who don’t have a technical background.
How Many Types of Shaft Alignment Are There?
There are two types of shaft alignment which are angular and parallel, and both can be further divided into horizontal and vertical. Misaligned shafts could be caused by angular or parallel alignment issues.
What is Shaft Misalignment?
Misalignment is most common in rotating machinery and occurs when two rotating shafts are either offset or separated by an angular gap. This results in performance issues and can be the root cause of machine failure.
Rotating shaft components can be hard to reach. And identifying shaft alignment issues once required a skilled technician and considerable time. However, advances in modern technology have made it easier than ever before to quickly spot and repair shaft alignment issues.
What are the Causes of Shaft Misalignment?
What are the primary causes of rotating shaft misalignment?
- Machinery settling: This can cause one or more feet to differ in height, leading to misalignment.
- Shaft warping: This can occur during startup, leading to distortion and misalignment.
- Human error: Improper alignment measurements can lead to misalignment.
- Pipe strain: This can result in both parallel and angular misalignment.
- Temperature changes: These can cause equipment to warp or expand, disrupting alignment.
Misalignment of shaft centerlines can produce wobbling and vibration, potentially causing severe damage to machinery if not addressed. Recognizing misalignment and its underlying causes is key to prolonging an asset’s lifespan.
Shaft misalignment is among the most prevalent machine faults. The following are some of its common causes:
- Soft foot: This can distort an asset’s frame, often leading to shaft misalignment.
- Pipe strain: This can lead to both parallel and angular misalignment.
- Thermal expansion: This can result in alignment shifts.
- Torsion: This can cause misalignment during machine startup.
- Human error: This can occur during the installation process, leading to misalignment.
Human error can also result in incorrect measurements, potentially missing misalignment. This underscores the importance of using appropriate tools to identify and rectify misalignment issues before they escalate into more significant problems.
What are Problems Caused by Shaft Misalignment?
When shafts are improperly aligned it can lead to the following issues:
- Broken bearings
- Vibration
- Broken seals
- Foundation bolt failure
- Coupling bolt failure
- Shafts break or crack
- Excess generation of heat
Shaft Misalignment Detection Procedures
When a machine begins displaying operational issues, the best place to start is to determine if there is a shaft misalignment. Implementing a preventive maintenance routine to verify precise shaft alignment will save money and time. Keeping shafts aligned also improves energy efficiency, increases uptime, and maximizes production output.
1. Laser Shaft Alignment Systems
A laser shaft alignment system can identify misalignment and calculates the precise measurements needed to achieve alignment.
Laser shaft alignment systems are unique in that they let users both diagnose and correct alignment issues, unlike other systems which only allow for one or the other.
Laser shaft alignment tools can be either dual- or single-laser systems. A dual-laser system is inferior to the quicker and more precise single-laser alignment system. In dual-laser systems, users find it harder to line up the laser and detector which can lead to imprecise measurements. As the measurement distance increases, aligning the tools can become even harder. Technicians must often restart measurements with no guarantee that the detector will be in range. With every repeat, process time increases and the potential for error grows.
A single-laser alignment system eliminates these issues. It effectively addresses most shaft misalignments.
A single-laser system has two optical detector planes in a single sensor, eliminating the technician’s need to perform the alignment manually.
2. Vibration Analysis
Every machine has a normal vibration level, but when it increases or exceeds acceptable limits, vibration analysis can help determine if a misalignment is the cause of the issue.
With advances in modern condition monitoring technology, vibration analysis has become more common and effective than ever before. Today, there are many types of vibration sensors. Accelerometer vibration sensors, piezo vibration sensors, MEMs vibration sensors, proximity sensors, or velocity transducers are the types most often used for vibration measurement and analysis. Once these signals are acquired with a data collector and vibration sensors, a vibration analysis can further diagnose the issue.
3. Thermography
Thermography identifies abnormally hot locations within your machinery and can often lead to early detection of misalignment. Misalignment causes an increase in friction within a machine, which can raise the temperature and even lead to damage. A thermal imager is used to measure an object’s infrared energy for visual display and easy analysis.
4. Oil analysis
Oil analysis helps detect misalignment by providing the general condition of an asset’s oil and contaminants. The process can be complicated and often requires the use of third-party companies for special analysis.
Correcting Machine Misalignment with Laser Shaft Alignment Systems
Today’s machines and their misalignment problems can vary greatly, and maintenance teams regularly face unique alignment challenges. As such, they require systems and software that can help with alignment in virtually any situation, regardless of the operator’s experience and skill.
Adaptive laser shaft alignment systems provide this flexibility. With software and other features that allow them to adapt to any situation and user experience level, laser shaft alignment systems maximize productivity and return on investment while making the process easier than ever before.
The best laser shaft alignment systems eliminate human error and deliver new levels of accuracy and speed with:
- Single-laser Alignment Technology. A single-laser system eliminates the many frustrations and risks of inaccuracies that occur when working with two lasers firing in opposite directions. Single-laser alignment systems are faster than dual-laser ones, enable rapid completion of alignment tasks, and improve precision.
- Intelligent Alignment Software. The right software tools provide maintenance teams with real-time, actionable intelligence by filtering out low-quality measurements. The software is situationally aware and dynamically reacts to everything involved in the alignment process. It provides predictive intelligence to allow technicians to evaluate different courses of action before embarking on the time-consuming task of moving a machine.
By leveraging these technologies, maintenance teams can deliver on the promise of adaptive alignment in all three critical areas common to every alignment task: the asset, the situation, and the maintenance team.
- Adapting to the Asset. Every organization’s machinery is different. Basic laser alignment systems are rigid and often don’t have support for your specific needs. Adaptive laser alignment systems are designed to be as flexible as possible by supporting the broadest range of machinery, eliminating manual workaround and the risk of inaccuracy.
- Adapting to the Situation. Adaptive laser alignment systems can adjust to different variables, such as rotation angle, speed, and evenness while delivering a quick and easy alignment experience. Even inexperienced technicians should have no trouble following the high-quality measurements and detail steps displayed by the software. It evaluates various factors in real-time for instantaneous feedback.
- Adapting to the Team. Technicians are human, and humans make errors. The best adaptive alignment systems obtain and utilize real-time analytics to remove false data and correct common errors made by inexperienced technicians. This ensures high-quality results regardless of an engineer’s experience level.
4 Types of Laser Shaft Misalignment

Experts generally agree on these four types of laser shaft machine alignment issues:
- Horizontal offset misalignment is comparable to vertical offset misalignment, but it happens in the horizontal plane
- Vertical offset misalignment happens when the two shafts slated for alignment have parallel centerlines, but the centerlines become offset vertically.
- Horizontal angle misalignment is comparable to vertical angle misalignment but occurs in the horizontal plane.
- Vertical angle misalignment is an angular misalignment of two shafts in the vertical plane. This type of laser shaft alignment issue is almost always a combination of both an angular and offset misalignment. It happens in both planes and is considered a compound misalignment.
4 Ways to Detect Shaft Misalignment Issues
Fixing a machine shaft misalignment can be accomplished in a number of ways. Here are four tools used to identify issues.
1. Laser Shaft Alignment System
Laser shaft alignment tools enable users to diagnose and fix misalignments. Checking for shaft alignment problems is often the first action taken when a machine starts having trouble. A laser shaft alignment system determines misalignment at the coupling and calculates the relevant machine movement needed to perform at the base.
Laser shaft alignment systems enable users to diagnose and correct alignment issues. Alignment tools like PRÜFTECHNIK Laser Shaft Alignment Systems provide real-time, accurate, and precise measurements. They let users know when the shaft is aligned correctly.
Two Different Types of Laser Shaft Alignment Tools
Laser systems can be either single-laser alignment tools or dual-laser shaft alignment tools. A dual-laser alignment system isn’t as capable and is more challenging to operate than a single-laser shaft alignment tool.
Single-laser Shaft Alignment System Benefits:
- Addresses many specific and complex shaft alignment challenges, including vertical flanged machines with right-angle gearboxes
- Uses two optical detector planes in a single sensor removing the technician’s task of performing a rough alignment to get both lasers on target
Dual-laser systems make it difficult for technicians to find and maintain the detector line. Therefore, as the measurement distance grows so does the difficulty.
As a result, technicians must restart measurements requiring them to stop, loosen the baseplate feet, move the machine and retighten the feet—all without guaranteeing that the detector will be in range. With every repetition, process time rises, and the possibility for error.
2. Vibration Analysis
Because of the speed at which modern data collectors can process triaxial sensor signals, vibration monitoring and analysis have become more common. All machines have normal vibration levels, but sometimes machine vibration increases beyond acceptable thresholds.
Reasons why vibration increases include misalignment, looseness, resonance, and unbalance. Vibration is usually measured using an accelerometer, followed by proximity sensors or velocity transducers. A vibration analyst can further diagnose the machine’s faults with this data.
3. Thermography
Thermography can detect alignment issues early by identifying hot spot abnormalities. Misalignment might cause an increase in friction within machinery followed by a rise in temperature. A thermal imager detects and measures an asset’s infrared energy and changes the infrared data into an electronic image showing its apparent surface temperature.
4. Oil Analysis
Oil analysis can identify an abnormal condition or parameter and the root cause before the failure further develops. Because oil analysis can be complicated, many organizations use specialized companies.
Fix Misalignment with Adaptive Laser Shaft Alignment Tools
Because machine misalignment problems vary, maintenance professionals require hardware and software alignment systems to adjust to diverse challenges. Teams also need tools that adapt to different team members’ experience and skill levels, including less-experienced maintenance team members. Choosing the best machine alignment tool can be challenging. Do your homework and look for tips on what to look for in a robust laser shaft alignment system.
With Pruftechnik’s advanced laser shaft alignment tools, you get the flexibility necessary to adapt to the situation, the asset, and the user experience level. These easy-to-use systems maximize production time and increase uptime by eliminating human error while providing new levels of accuracy and speed.
Machinery alignment is a key part of installing new equipment, maintaining your existing assets, or integrating new parts. Today’s equipment requires precise alignment to reach optimal performance, and you can’t always achieve that using tools like straight edges or dial indicators. That’s where laser alignment tools can make a major difference, pinpointing even the smallest misalignments so that you can correct them right away and keep your equipment operating smoothly.
Over time, misalignment can cause fuel leaks, wear and tear on parts, and even machine failure, which can lead to costly unplanned downtime. Even seemingly minor misalignment, which is difficult to observe using conventional tools, can eventually cause breakdowns in your equipment and assets. In fact, misalignment is one of the top reasons machines fail.
Laser alignment is the most accurate and precise way to check the alignment of two or more rotating shafts, pulleys, belts, or other machine components or structures. It’s also easy to learn how to apply laser alignment, even without specialized training. Overall, the right laser alignment tool will boost productivity while saving time and costs associated with unexpected downtime and maintenance.

