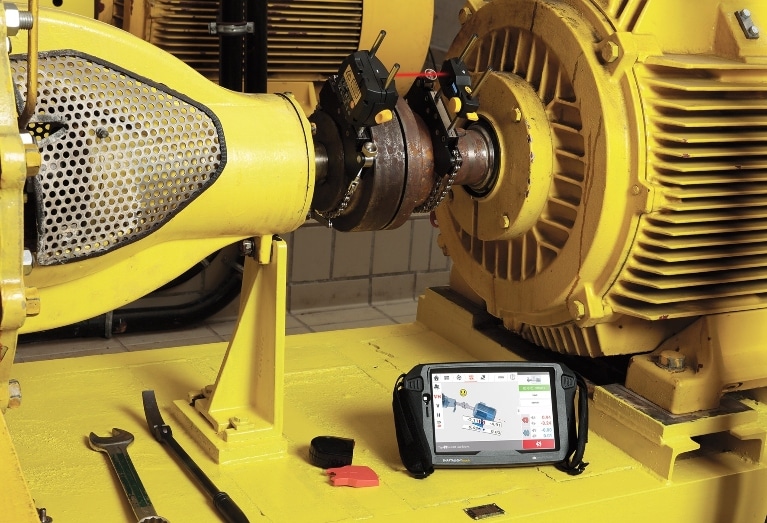
A worn-out bearing may have many causes. But, in most cases, the source of the problem is misalignment. High resilience from the rotatable shaft may result in bearing damage that affects your machines and leads to production inefficiencies.

PRUFTECHNIK, the inventor of laser shaft alignment solutions, can uncover the underlying issue. Now a division of Fluke Reliability, it has been diagnosing misalignment for more than 35 years.
In this blog post, we shine the spotlight on one of its latest innovations — and a key feature behind its industry-leading ROTALIGN and OPTALIGN tools.
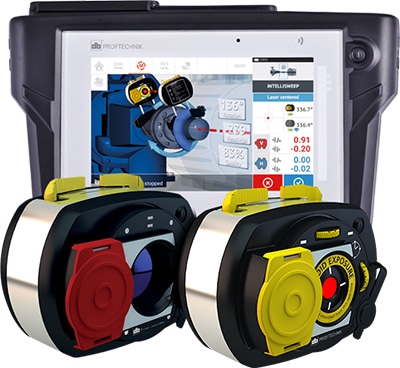
sensALIGN is the laser and sensor measurement technology that is unique and a differentiator in precision shaft alignment. It is available with both ROTALIGN touch and OPTALIGN touch.
Past measurement practices now obsolete
Let’s see how alignment conditions for rotatable machines were analyzed in the past. Measuring by straightedge and dial gauge was the standard. Even today, some specialists still trust in this ancient technology.
It is not incorrect to use straightedge and dial gauge, but it is time-consuming and requires meticulous and skillful personnel when it comes to getting accurate measuring results.
To accurately measure the angularity of a misaligned machine, it takes at least two measurements on a dial gauge. It is extremely important to put distance between the first measuring point and the second one. The further the distance, the more accurate and precise the measurement.
To measure offset, you repeat the measurement in another clock position different from your first two measurement points. As you can see, this job is time-consuming, and for specialists only.
PRUFTECHNIK has made all this redundant with the sensALIGN laser and sensor technology.
Combining two measurements into one
As we just noted, measuring angularity and offset always takes at least two measurements. The sensALIGN technology does it all with a single measurement.
The single laser beam is shot into the sensor center, where it is focused and minimized by an optical lens. A semipermeable mirror splits the laser beam into two, deflecting one beam onto the front detector and the second onto the rear detector.
This distinctive global technology guarantees that the distance between the first and the second measurement point will always be the same, exact distance. The front detector equals the first dial gauge measurement point, while the rear detector equals the second dial gauge measurement point.
Based on this, the distance between the laser and sensor can be either set down to zero millimeters or up to as much as 10 meters.
The high-performance technology guarantees precision and repeatability.
Now, let’s see and understand how precise PRUFTECHNIK’s sensALIGN detectors are. The resolution of each detector is at 0.001 millimeter; that means 1 micrometer.
And since the detector areas are given in x- and y-axis, sensALIGN can measure shaft angularity and offset in one single shaft rotation.
Live Move and Live Trend features
Additionally, the Live Move feature, which enables aligning the machine shaft with the laser and sensor heads mounted to directly control the alignment process, can be started and terminated in any position.
Another special feature that only PRUFTECHNIK provides is Live Trend, based on the x- and y- split detection areas. The sensALIGN laser and sensor technology can record the thermal growth of the machine while it is running.
ROTALIGN touch is featuring the high-performance sensALIGN 7 laser and sensor heads, including all PRUFTECHNIK intelligent shaft-alignment features such as the advanced multi-coupling measurement and Live Move of up to 6 shaft couplings at a time.
OPTALIGN touch is equipped with the powerful sensALIGN 5 laser and sensor technology. This alignment device is a must-have tool for every maintenance workshop.
OPTALIGN can be easily upgraded with a sensALIGN 7 laser and sensor unit for full access to PRUFTECHNIK intelligent alignment features, including alignment of vertical machines and extended cardan shaft features.
For visuals on how sensALIGN works, please watch this PRUFTECHNIK video.
Learn more about ROTALIGN touch and OPTALIGN touch at PRUFTECHNIK.com.

