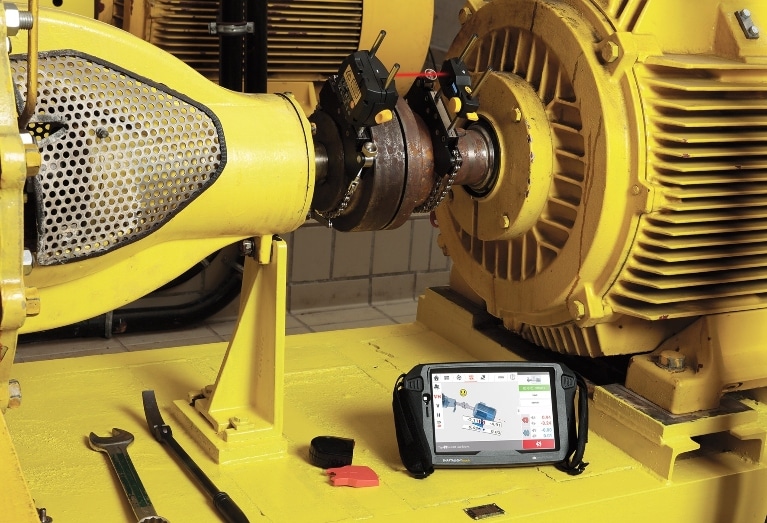
Millwright Matt Joinson takes on industrial machinery alignment jobs that would challenge anyone.
From dusty, dirty mining sites in freezing weather to sawmills and pulp mills in hot, humid temperatures, Joinson doesn’t back down. He’s ready with his RotAlign Touch and other Prüftechnik laser alignment tools to handle jobs in the most demanding conditions. It’s all about knowing what to expect, having the right equipment, and being gritty and ready, he says.
Joinson, owner-operator of Jaffray Millwright and Welding of Jaffray, British Columbia, and Payam Assadi, sales manager for Prüftechnik Canada, describe in a Fluke Reliability webinar in February 2021 some of the challenging alignment scenarios they’ve encountered over the years. They also shared their expert advice on using laser shaft alignment tools in demanding conditions.
“Make sure your alignment tool is IP-rated for all-weather conditions,” Joinson says as one of his top tips. “You need the battery to hold up and the screen to function no matter what.”
“I try to put my RotAlign Touch screen in a reasonably safe spot, but things happen,” he adds. “It’s gotten knocked off the motor, and I’ve dropped it a few times and never had to stress about it. With Gorilla Glass, even cracked, you can still use it, and the touch housing works with gloves and greasy hands.”
Follow a pre-alignment checklist
Both Joinson and Assadi stress that a big part of being ready is taking the time to run pre-alignment checks. “You can have the best tool in hand, and if these checklists are not followed, you can still run into problems,” Assadi notes. Items on their checklist include:
- Ensure lockout/tag-out
“This is the most important – personal safety and safety for everyone around you,” says Joinson. Never take the guards off until you’ve verified that machines are turned off, not running, and locked out, taking site-specifics into account. - Check for smoothness of the base
Preparation of the machinery baseplate and machine mounting surfaces, feet, pedestals, and similar foundation is paramount. Have a good look at the condition before starting, especially in corrosive environments. - Look at the number and quality of shims under each foot
Keep shims to a minimum – if possible, use no more than a maximum of three to four shims under machinery feet or mounts. More than that lets in too much debris and flexibility. Also, verify that the shims are in good condition. Some people re-use shims, but you have to be careful. - Check on bent bold/damaged washers
It’s smart to look for bent bolts or cupped washers or even loose mounting bolts. - Are all jack bolts present and in usable condition?
Jack bolts need to be clean, lubricated, and unbent. If jack bolts aren’t present, install new ones or consider using clamp-on brackets. - Is pipe strain an issue?
Pipe strain can vary depending on the installation, so it’s good to check. Ensure that any pipework attached to machines is correctly supported but free to move with thermal expansion. “You may need to machine the feet, extend the piping, change the bracketing, or add bellows,” says Joinson. “If you are using a RotAlign Touch, the Live system will give you an estimate of how much it moves,” Assadi adds. - Check for run out
This can haunt your alignment if you don’t take care of it before you start. Carry out necessary checks to determine the machine couplings’ accuracy and look for “run-out” concentricity to the shaft centerlines. Coupling halves that aren’t “true” can cause out-of-balance problems. - Is soft foot eliminated?
Don’t neglect it! Check that the pump/motor set is sitting square to the base plate. Run a soft foot check and correct as required. Figure 1 shows four different types of soft foot. Some consider “angular” soft foot to be the trickiest. Depending on the industry, Joinson and Assadi suggest step-shimming. - Is thermal growth accounted for?
Always check the manufacturer’s alignment figures before commencing work. Temperature growth may require specific “cold” alignment offsets. If you’re using a RotAlign Touch, here are three options for performing a thermal growth integration:
- Machine specification: Use the established targets
- Thermal growth calculator: Enter final temperature, initial temperature, distance from the feet to the enter coupling centerline, and casing material for the thermal expansion coefficient
- Live Trend: This RotAlign Touch feature measures hot to cold or cold to hot and can even tell you the degree of horizontal movement
A poll of the webinar audience suggested that soft-foot checks were probably the most commonly neglected pre-alignment step, followed by checking for pipe strain. For machine installations, Joinson and Assadi provide an additional set of recommended guidelines to follow, included in the webinar.
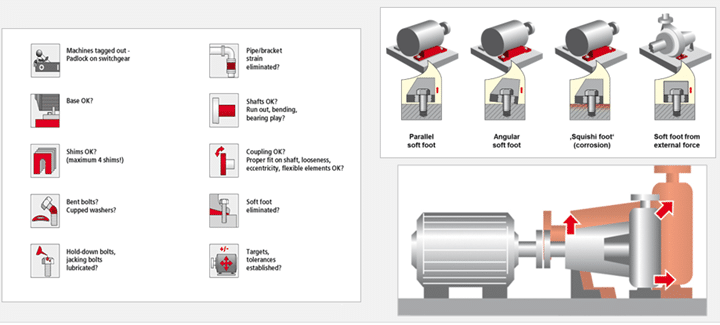
Figure 1. Pre-alignment checklist
Coping with couplings
Familiarity with couplings is a close second to the pre-alignment checklist on the readiness scale. Of all the coupling types, Joinson says that fluid couplings and spacer shafts with the flexible disk are the most technical couplings he faces because they require more precision. Advice from Joinson on couplings includes:
- Grid couplings can be challenging, depending on what degree of access you have to the machine, so use your measurement modes.
- For spacer shafts, just make sure your alignment laser is centered in the head, and then you should have a pretty good window of measurement.
- For the larger Cardan shafts that you might find in a mill, put the brackets onto the drive hubs and save yourself the labor of pulling it out. It helps to use the RotAlign Touch to change the coupler type, set targets, and adjust tolerances.
Conducting straightforward alignments
Figure 2 demonstrates the core elements of more straightforward alignments. “For these,” says Joinson, “I use the IntelliSWEEP measurement mode of the RotAlign Touch. If the access is wide open and you can eyeball the rough alignment and hook up the RotAlign using standard brackets and the sweep function.
“The software wizard makes it step-by-step. You don’t have to start at any particular foot, which is particularly handy with larger motors where it’s awkward getting from one side to the other.”
The Simultaneous Move function between the vertical and horizontal also is handy. “I like that I can leave it anywhere. If it’s going to work better for you to move the heads while doing your measurement, it’s not a problem – you can do simultaneous corrections, and it saves you a lot of headaches. One thing to watch out for, though, is whether anything else is affected by the move when you’re coupled.”
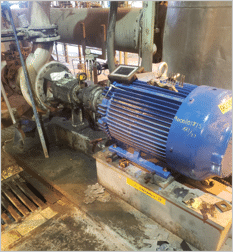

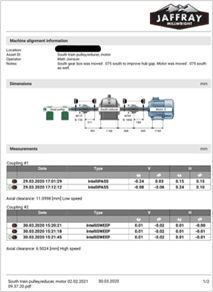
Figure 2. Examples of straightforward alignment scenarios using the RotAlign Touch
Chain drive for a pan feeder
In the example Joinson shares in Figure 3, he was working on the chain drive for a pan feeder to a rotary breaker at a mining site. Joinson sees numerous drives in mining, some with chains, some with belts, some with reducers, and many with combination drives.
In this situation, Joinson had to get a hot-work permit because there wasn’t time for a shutdown. And then, the difficulties: “The design of this base was painted, with no blocks to put on for the motor feet, and no jack bolts. So, we had to create some clamps. On top of that, the coupling was so close to the cooling fan of the reducer; we had to use the offset bracket. And, we had very little room to move when aligning with the drive train; it was hard to access.”
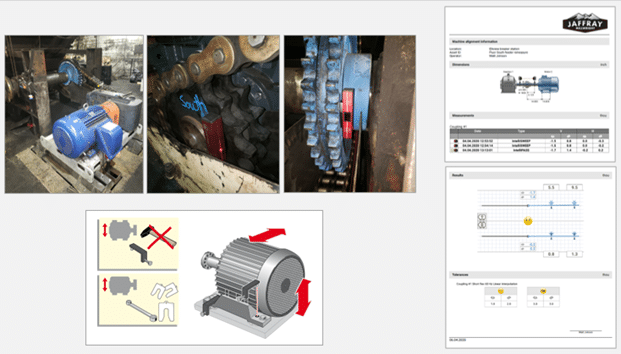
Figure 3. Aligning the chain drive for a pan feeder
Large conveyor drive with a machine train
In the machine train alignment pictured in Figure 4, Joinson used two heads simultaneously, combined with Move Simulator and simultaneous Live Move horizontal and vertical on both couplings.
“I had to use two sets of heads to go through and two different measurement modes because only one side could move. We connected the two sets of heads to the RotAlign tablet, conducted our measurements, and then when we were trying to adjust it, we used the simulator to overcome bolt bind issues. We only had so much room to move due to the large disc brakes.”
“We had to switch our measurement types a couple of times while working with the technicians, as they spliced this large belt and switched the tension levels,” he says. “At this point, it was still free for us to move and turn, so I used the Live Trend brackets. Both of these couplings were in good shape, clean and smooth. And the Live Trend brackets are so versatile; you can put them on a large coupling on a flat wall on a shaft. It doesn’t matter.”
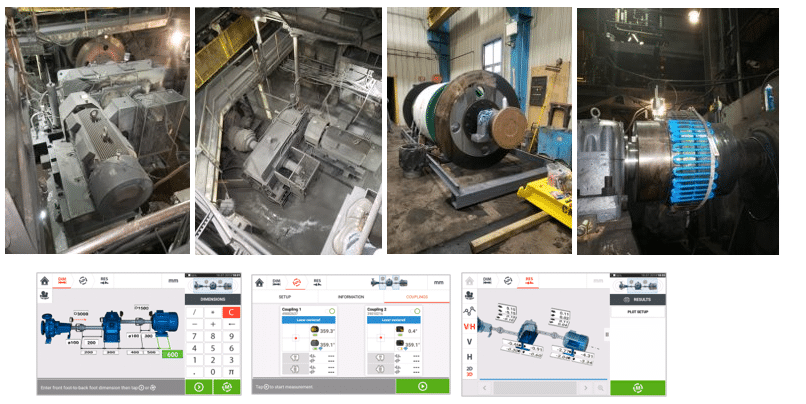
Figure 4. Aligning a large conveyor drive with a machine train
Continuous learning
Joinson encourages alignment pros to connect with him and other Prüftechnik tool users on LinkedIn. “I like the community of Pruftechnik users; I reach out, and they always have suggestions,” he says.
View the entire webinar, “Tips for getting precise measurements in demanding conditions,” for Joinson and Assadi’s advice about brackets, reports, and other elements.
Related articles:


