As the adoption of automation has expanded, the need to ensure power quality has also risen. A power interruption at home is a minor inconvenience — but in a production line, even a momentary lapse in power can lead to equipment failure. While older electromechanical equipment was not as sensitive to changes in voltage, one drawback to today’s newer automated technology is that they are more susceptible to power quality issues.
Luckily, power monitoring tools now make it easier than ever to keep on top of power quality problems.
What is Power Quality and Why is It Important?
Some automated equipment is sensitive to power quality issues that can cause equipment to run inefficiently, malfunction or fail. For example, unexpected sags or surges in voltage can lead to overheating, component failure, automatic resets, data errors, corrupted software, and more.
Since equipment disruptions can lead to inaccurate or incomplete data signals, reliability and peak performance are less attainable. This can lead to additional problems like equipment damage or product quality issues. Even a small disruption can impact an entire system.
How is Power Quality Measured?
Power monitoring systems are an effective way to gather data about how and why power issues are occurring. Once power quality issues are detected and identified, most can be resolved with a few steps. For example, if a manufacturing line is down because a three-phase circuit breaker has tripped, it is necessary to figure out why the breaker tripped in the first place and why it seems to be a random occurrence. With power quality monitoring systems in place, users will have the necessary data to understand when, why, and how the issue occurred.
4 Steps to Monitor and Resolve Power Quality Issues
Since many power quality events happen on the user’s side of the meter, they should take a proactive approach by learning about common symptoms and effects of different power quality events.
1. Gather Information
To get to the root of the problem, you have to gather as much information about it as possible. Observe the condition monitoring data and check with those who may know the machinery more intimately to understand what symptoms they may have been aware of, and what happened the last time the breaker tripped.
Keep these questions in mind while looking around the production line:
- Has anything changed recently?
- Did any new machinery get installed?
- Has any equipment been removed?
Consulting an up-to-date drawing is also key to the investigation. Be sure to check it against what is seen on the floor. Any changes are potential areas for concern.
2. Get Set Up for Power Quality Measurements
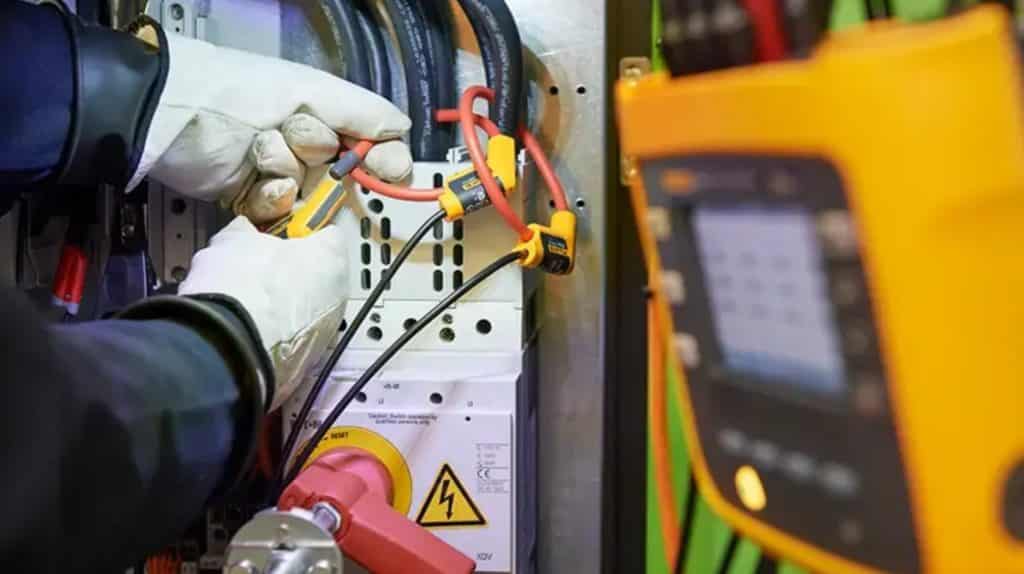
Once the maintenance team has enough actionable data to move forward, the next step is to take measurements. An instrument that offers a wide range of measurements, such as a power quality analyzer, is often the key to success in finding the problem quickly so it can be repaired efficiently.
If possible, it is good practice to install the power quality analyzer before switching the breaker back on. Once the tool is installed, be sure to double-check all the connections, while considering:
- Are the voltage leads connected to the right phases?
- Are the current probes connected to the right phases?
- Are the probes oriented correctly?
Check the reading on the measurement device — modern power quality analyzers often have a feature that automatically indicates the correct connection.
If multiple power quality readings are needed over an extended period, keep the analyzer’s power supply in mind. Some modern analyzers have the ability to draw power straight from the measurement circuit, so battery life or proximity to a wall outlet are non-issues.
3. Power Up the System & Look for the Problem
Next, reset the breaker and return power to the system. At this point, you should pay close attention to two things:
- Is the voltage within the expected tolerance of +/- 10%?
- Is the current being drawn to the expected range?
This information can offer a quick indication of where the problem might lie. If the voltage is outside of the expected tolerance or the current draw is too high, the breaker might trip.
Next, consider the power factor — having one below 0.85 is wasteful and can indicate loading problems. This can be relatively easy to fix.
If the basics appear normal, check the total harmonic distortion (THD) — this can indicate that some loads are creating problems. Check the unbalance percentages or look at the phasor diagram on the analyzer for voltage and current. Consider the dips and swells documented on the analyzer—has the voltage been outside of limits while measurements have been running?
4. Leave the Power Quality Analyzer
If all these steps have been completed and the problem is not yet clear, consider leaving the power quality analyzer in place, using it as a condition monitoring sensor so that continuous information can be logged. If the breaker trips for a fourth time, the logger can capture everything that happens before and after the trip. That data can then be downloaded, and a report can be generated to share with experts to fully fix the problem.


