With decades of experience educating customers on the finer points of vibration testing, Prüftechnik has developed an authoritative list of best practices for condition monitoring and vibration analysis. The following is summary to get you started on your condition monitoring journey. For those who need help with the next steps, we offer expert services that can provide continuous support — or even additional training.
Start with Asset Criticality
Always Confirm the Running Speed
As with any reliability strategy, it’s best to begin with an asset criticality assessment. Keep in mind that the type and amount of data you need will vary from one machine type to another. Build a good working knowledge of your critical machines and the types of data collected from them.
Condition monitoring should be an adaptive process. The analyst needs to be able to determine what piece of data to collect next, based on the data that was just collected.
Any condition monitoring program will likely include vibration analysis since it’s the most common and cost-effective condition monitoring solution. But you should also have other data collection methods or tools to help determine the condition of your machines.
Figure 1 below outlines the four main condition monitoring principles:
- Detection: Detect issues through trending vibration levels.
- Analysis: Use vibration analysis to find the fault.
- Correction: Take corrective action to fix the immediate issue.
- Verification: Verify the fix has worked with additional readings.

The Four Main Condition Monitoring Principles
Utilize condition monitoring on all or most of your prescribed routes to periodically collect high-level vibration monitoring data. Look for changes in the machines; if there are signs of a problem, go back and look deeper using vibration analysis.
Other points to consider:
- Some motor vibration problems can be easily diagnosed with a minimum of data, while others require considerable time and effort in data collection and analysis.
- To find the solution as efficiently as possible, the analyst should know “if” and “what type” of additional condition monitoring data is required to solve the problem.
For that reason, record as much machine failure data as possible.
View these data-gathering recommendations as an opportunity for your plant. You can use your computerized maintenance management system (CMMS) or condition monitoring software to store failure information to expand your knowledge of how your machines fail and what kind of failure mode indicators to anticipate.
To illustrate, let’s review the four-step process, from noticing a change in the vibration trend plot (Figure 2a) to doing a more in-depth vibration spectra analysis (Figure 2b), taking corrective action, and confirming the fix (Figure 2c).
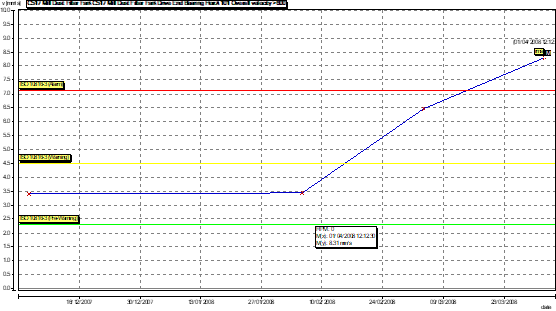
Figure 2a. Example of a vibration trend plot demonstrating a change in the levels.
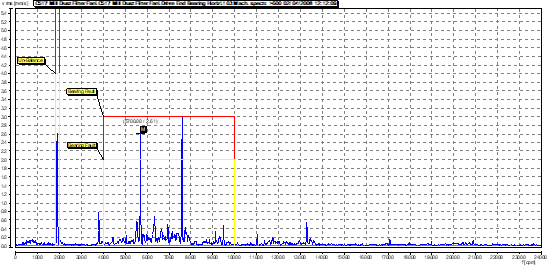
Figure 2b. Example of vibration spectral analysis
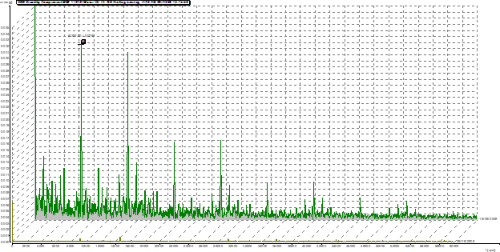
Figure 2c. Verification measurements to confirm all defects have been eliminated and establish a new baseline
Spectral analysis involves processing the analog vibration signal through a digital converter and then through FFT circuitry; this allows us to see specific amplitudes at the individual frequencies which can identify any machinery problems. For vibration analysis, the appearance of peaks at specific frequencies can be indicative of a problem.
Here’s a quick guide to machine fault indicators:
- Peaks at 1x — Unbalance
- Peaks at 2x and or 3x — Misalignment
- Peaks at Line Frequency and 2x Line frequency — Electrical problems
- Non-synchronous peaks — Bearing fault frequencies
What to do When Condition Monitoring Uncovers an Issue
- Look at the machine history.
- Ask questions about when the problem started and how it manifested.
- Find out what kind of changes happened recently to the machine or operating environment.
- Confirm the running speed.
- Get the machine details and operating conditions.
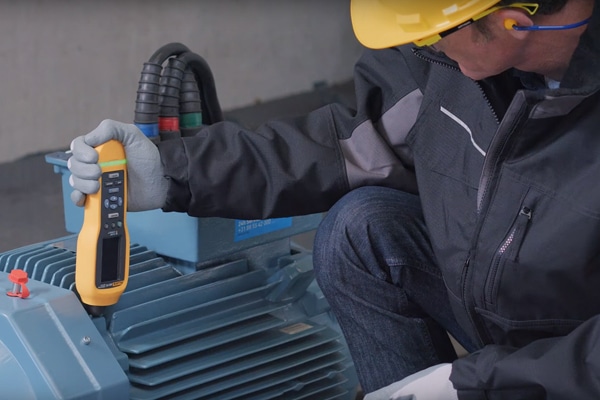
- Conduct a visual inspection.
- Work through the measurement locations to the end of the drive train, always confirming each stage’s running speed.
- Collect overall velocity readings.
- Collect overall bearing condition measurements.
- Check vibration levels at points other than the bearings: base, foundation, mounting feet, background, or floor vibrations.
- If possible, take temperature or thermal measurements.
- Collect vibration spectrum data in each plane (H, V, A) and at each bearing point.
- Share your findings and work out the cost savings of your recommendations.
Possibly the most crucial point is to always to confirm the running speed.
And don’t forget to record the phase — it can help differentiate between imbalance, foundation issues, or misalignment. Collect it using a triggered input such as a laser tachometer, photocell, key phasor, or stroboscopic light activated by a filtered vibration amplitude.
If you need help, Fluke Reliability offers a condition monitoring service that’s customizable for the unique needs of your organization.


